Honeywell central heating controllers offer advanced solutions for managing heating systems efficiently. They provide precise temperature control, energy-saving features, and seamless integration with smart home systems. These devices ensure optimal comfort and energy efficiency through programmable schedules and intuitive interfaces, making them a reliable choice for modern households.
Overview of Honeywell Central Heating Controllers
Honeywell central heating controllers are designed to optimize heating system performance, offering precise temperature control and energy efficiency. Models like the ST9100A and CM727 provide programmable scheduling, manual or automatic operation, and built-in memory for consistent settings. These controllers ensure seamless integration with various heating systems, including gas and oil, while offering features like override facilities and smart home compatibility. Their user-friendly interfaces and advanced functionalities make them ideal for modern households seeking comfort and energy savings.
Importance of Proper Controller Setup
Proper setup of Honeywell central heating controllers is crucial for maximizing energy efficiency, comfort, and system longevity. Correct installation ensures accurate temperature control, optimal scheduling, and smooth operation. Improper setup can lead to inefficiencies, higher energy bills, and potential system damage. Following manufacturer guidelines and understanding features like manual and automatic modes, override facilities, and temperature setpoints ensures the controller functions as intended, providing reliable performance and maintaining desired settings for consistent heating and hot water supply.

Installation and Setup Instructions
Ensure compatibility with your heating system and follow the user guide for precise installation steps. Proper setup involves connecting wires, setting the clock, and configuring basic settings. Always refer to wiring diagrams and manufacturer instructions for a seamless installation process that ensures optimal performance and safety.
Initial Setup and Installation Requirements
Before installation, ensure compatibility with your heating system and verify all components are included. Follow the user guide for specific wiring diagrams and steps. Ensure the power supply matches the controller’s requirements. Turn off the power to the heating system before starting. Refer to the installer setup mode for advanced configurations. Proper ventilation and placement are crucial for optimal performance. Set the clock and configure basic settings like temperature limits. Always adhere to safety guidelines and manufacturer instructions for a successful setup.
Connecting the Controller to the Heating System
Connect the Honeywell controller to your heating system by following the wiring diagram provided in the user guide. Ensure all terminals are securely connected to avoid malfunctions. Typically, connect the live, neutral, and earth wires to the appropriate terminals. For systems with hot water, connect the relevant wires to control both heating and water. Double-check connections to prevent short circuits. Power on the system only after ensuring all wiring is correct. Refer to the installer setup mode for additional configuration if necessary.
Powering On the Controller for the First Time
After installation, power on the Honeywell controller by connecting it to the mains electricity. The display will illuminate, and the system will initialize. If the controller has a built-in clock, it may automatically set the time. If not, manually set the time and date. Ensure the system is set to the correct mode, either manual or automatic. The controller will now be ready to operate, allowing you to set temperature preferences and schedules for optimal heating control. Always refer to the user guide for specific startup instructions.

Programming the Heating Schedule
Programming the heating schedule on a Honeywell controller involves selecting between Manual (MAN) and Automatic (AUTO) modes. In Manual mode, a fixed temperature is maintained throughout the day. Automatic mode allows setting different temperatures at specific times, optimizing energy use according to your daily routine. A weekly schedule can be created with designated on/off times, saved in the controller’s memory for consistent operation. Adjustments can be made using override facilities, and temperature setpoints can be fine-tuned for comfort and efficiency.
Understanding Manual (MAN) Mode
Manual (MAN) mode allows you to set a fixed temperature that remains constant throughout the day. This mode is ideal for maintaining consistent comfort without scheduled changes. The controller acts as a simple thermostat, switching the heating system on or off to maintain the set temperature. You can adjust the manual temperature using the controller’s interface, ensuring your home stays at a comfortable level. This mode is useful when you prefer not to follow a programmed schedule or need temporary adjustments, providing flexibility for your heating needs.
Setting Up Automatic (AUTO) Mode
Automatic (AUTO) mode enables your Honeywell controller to follow a programmed schedule, optimizing energy use and comfort. You can set specific temperatures for different times of the day, ensuring your home is warm when needed and saves energy when not. The controller automatically switches between heating periods, maintaining your desired settings. This mode is perfect for maintaining a consistent routine, as it adjusts temperatures based on your pre-set preferences, ensuring efficiency and convenience without manual adjustments needed.
Creating a Weekly Heating Schedule
Creating a weekly heating schedule with Honeywell controllers allows you to tailor your heating usage to your lifestyle. Program specific temperatures for each day, ensuring energy efficiency and comfort. For example, set lower temperatures during work hours or when the house is empty. Use the controller’s interface to assign different setpoints for mornings, evenings, and weekends. This feature ensures your home is warm when needed and saves energy when not, optimizing both comfort and energy savings throughout the week.

Operating Modes and Features
Honeywell central heating controllers offer Manual (MAN) and Automatic (AUTO) modes, providing flexible temperature management. They feature override options for heating and hot water, and adjustable setpoints for customized comfort. These modes and features enhance energy savings and system responsiveness.
Switching Between Manual and Automatic Modes
Switching between Manual (MAN) and Automatic (AUTO) modes on Honeywell controllers is straightforward. In MAN mode, the thermostat maintains a fixed temperature setpoint throughout the day. This mode is ideal for temporary adjustments or consistent comfort. Conversely, AUTO mode follows a programmed schedule, optimizing energy usage by adjusting temperatures based on the set times. Users can seamlessly toggle between modes using the controller interface, ensuring flexibility in managing their heating preferences efficiently.
Using Override Facilities for Heating and Hot Water
Honeywell controllers offer override facilities, allowing temporary adjustments to heating and hot water schedules without altering the main program. These overrides are ideal for unexpected changes in occupancy or comfort needs. Users can activate overrides directly from the controller interface, setting a specific duration or until the next scheduled period. This feature ensures flexibility while maintaining energy efficiency. Once the override period ends, the system automatically resumes its programmed schedule, providing seamless control over heating and hot water systems.
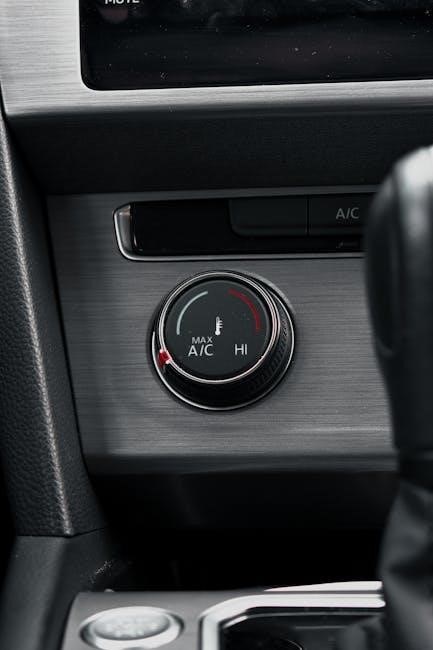
Adjusting Temperature Setpoints
Adjusting temperature setpoints on Honeywell controllers allows precise control over heating levels. Users can manually increase or decrease the setpoint using the controller’s interface or remote app. For energy efficiency, set temperatures between 18-22°C. Temporary overrides can be applied without disrupting the main schedule. Ensure the setpoint is higher than the current room temperature for heating activation. Proper adjustment enhances comfort and energy savings, while maintaining system performance. Always refer to the user guide for model-specific instructions on setpoint customization and optimization.
Maintenance and Troubleshooting
Regularly inspect wiring and ensure proper ventilation for optimal performance. Address common issues like faulty sensors or incorrect settings. Resetting to factory defaults can resolve many operational problems.
Regular Maintenance Tips for Optimal Performance
Ensure proper ventilation around the controller to prevent overheating. Regularly inspect and clean the device to remove dust or debris. Check wiring connections for integrity and tighten if necessary. Replace batteries in wireless models when indicated. Update software periodically for enhanced functionality. Verify temperature settings align with your comfort needs. Schedule annual professional checks for the entire heating system. Address any error messages promptly to avoid operational issues. Maintain consistent power supply to prevent data loss or system resets.
Common Issues and Their Solutions
If the display is blank, check the power supply and ensure batteries are installed correctly. For temperature inaccuracies, recalibrate the thermostat or reset it to factory settings. If the heating doesn’t activate, verify the schedule and mode settings. Check for loose connections in wiring and ensure the boiler is functioning. Address error codes by consulting the user manual or contacting support. Ensure the device is updated with the latest software to maintain optimal performance and resolve glitches.
Resetting the Controller to Factory Defaults
To reset your Honeywell controller, press and hold the reset button (usually located on the back or bottom) for 10-15 seconds. Release the button and wait for the device to reboot. For some models, insert a pin into the reset pinhole and hold for 5 seconds. After resetting, cycle the power by turning it off and on. The controller will revert to factory settings, erasing all custom schedules and preferences, requiring you to reprogram it for proper operation.

Energy Efficiency and Savings
Honeywell controllers optimize energy use through smart scheduling and built-in memory, ensuring reduced consumption and lower utility bills while maintaining comfort. They adapt to your heating needs efficiently.
Maximizing Energy Savings with Smart Scheduling
Smart scheduling with Honeywell controllers allows users to customize heating programs, optimizing energy usage. By setting specific times for heating and hot water, you avoid unnecessary consumption. Advanced features like automatic mode adapt to your daily routine, ensuring the system runs only when needed. This tailored approach significantly reduces energy waste, leading to lower bills and enhanced environmental efficiency without compromising comfort.
Using the Built-in Memory for Energy Efficiency
Honeywell controllers feature built-in memory that stores user programs indefinitely, ensuring uninterrupted energy-efficient operation. This memory retains schedules and settings even during power outages, eliminating the need to reprogram. By maintaining consistent heating routines, the system minimizes energy fluctuations, optimizing efficiency. This reliability ensures that your customized settings contribute to steady energy savings and consistent comfort throughout the year.
Understanding the Impact of Temperature Settings
Temperature settings play a crucial role in balancing comfort and energy savings. Lowering the setpoint by just 1°C can significantly reduce energy consumption. Honeywell controllers allow precise adjustments, ensuring your home stays comfortable while optimizing efficiency. Maintaining consistent temperatures avoids frequent heating cycles, which can strain the system. By understanding and adjusting these settings, users can achieve a perfect balance between energy efficiency and desired comfort levels in their homes.
Advanced Features and Compatibility
Honeywell controllers feature advanced components like zone panels, thermostats, and adapters, ensuring compatibility with multi-zone systems and various heating types, while offering enhanced control and performance.
Zone Control and Multi-Zone Systems
Honeywell controllers support zone control, allowing different areas of your home to have independent temperature settings. This feature enhances comfort and efficiency by only heating occupied zones. Multi-zone systems integrate seamlessly with Honeywell’s components, such as zone panels and dampers, ensuring precise control. These systems are ideal for larger homes or those with varied heating needs, providing flexibility and energy savings through tailored temperature management.
Integration with Smart Home Systems
Honeywell controllers seamlessly integrate with smart home systems, enabling voice control through platforms like Amazon Alexa and Google Assistant. Using the Honeywell Home app, users can remotely monitor and adjust heating settings. This integration allows for enhanced convenience, energy efficiency, and smart automation. Compatibility with popular smart home ecosystems ensures that Honeywell systems can be easily incorporated into existing setups, offering a modern and connected heating solution for homeowners.
Compatibility with Gas and Oil Heating Systems
Honeywell controllers are designed to work efficiently with both gas and oil heating systems. They ensure optimal performance by adapting to specific system requirements. For gas systems, the fan operation switch is preset to maintain efficiency, while oil systems benefit from precise temperature control and timing. This versatility makes Honeywell controllers a reliable choice for various heating setups, providing consistent comfort and energy savings regardless of the fuel source.

Popular Honeywell Controller Models
Honeywell ST9100A, CM727, and T6/T9 models are widely recognized for their reliability and advanced features, offering programmable scheduling and smart home integration for efficient heating control.
Honeywell ST9100A Timer Instructions
The Honeywell ST9100A timer provides precise control for central heating systems, allowing users to set ON and OFF periods. It features a built-in memory that retains programmed settings indefinitely. Designed for simplicity, the ST9100A ensures energy efficiency by aligning heating operations with household schedules. Compatibility with various heating systems, including gas and oil, makes it a versatile solution. Detailed instructions are available in the user guide, covering installation, programming, and troubleshooting for optimal performance and energy savings.
Honeywell CM727 Programmable Thermostat Guide
The Honeywell CM727 is a programmable room thermostat designed to regulate heating systems efficiently. It operates by sensing air temperature, activating heating when it drops below the setpoint and deactivating once the desired temperature is reached. This thermostat is user-friendly and energy-conscious, allowing for tailored temperature settings. The guide provides step-by-step instructions for installation, programming, and troubleshooting, ensuring users can maximize comfort while minimizing energy consumption. Compatibility with various heating systems makes it a practical choice for different household needs.
Honeywell T6 and T9 Smart Thermostat Models
The Honeywell T6 and T9 smart thermostats are advanced models designed for seamless integration with smart home systems. They offer voice control compatibility with smart speakers and remote monitoring via the Honeywell Home app. These thermostats feature geofencing technology to adjust temperatures based on your location and provide detailed energy usage reports. Their intuitive interfaces and adaptive learning capabilities ensure optimal comfort and energy efficiency. Compatibility with various heating systems, including gas and oil, makes them versatile solutions for modern homes.
Safety and Best Practices
Always follow installation guidelines to ensure safe operation. Regular maintenance is essential for optimal performance and safety. Proper ventilation prevents carbon monoxide buildup. Adhere to user guidelines.
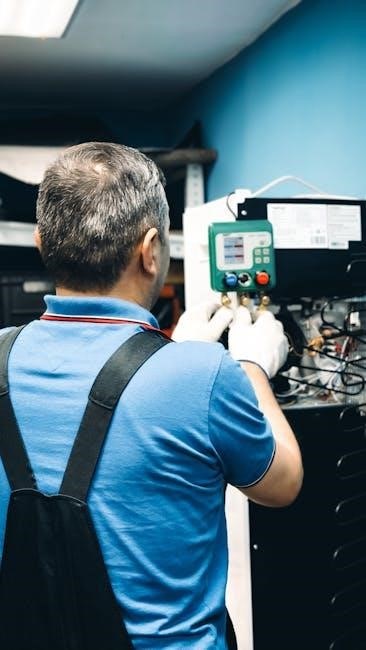
Safety Precautions for Installation and Use
When installing or using Honeywell central heating controllers, ensure the power supply is turned off to avoid electrical hazards. Always follow the manufacturer’s instructions for wiring and setup. Keep the controller away from direct heat sources and flammable materials. Proper ventilation is crucial to prevent carbon monoxide buildup. Never attempt repairs without disconnecting the power. If unsure, consult a qualified technician. Regularly inspect the system for damage or wear. Adhere to all safety guidelines in the user guide to ensure safe and efficient operation.
Best Practices for Controller Placement
Position Honeywell controllers in a central location, away from drafts or extreme temperatures. Avoid placing them near windows, radiators, or fireplaces to ensure accurate temperature readings. Mount the controller at a height of 1.5 meters for optimal performance. Keep the area around the device clear of obstructions to maintain proper airflow. Ensure the controller is easily accessible for programming and adjustments. By following these guidelines, you can achieve precise temperature control and maximize energy efficiency in your home.
Ensuring Proper Ventilation for Heating Systems
Proper ventilation is crucial for the safe and efficient operation of heating systems. Ensure all rooms, especially those with gas or oil-fired heaters, have adequate airflow. Install vents or fans to remove stale air and moisture, reducing the risk of condensation damage. Regularly inspect and clean vents to prevent blockages. Maintain a well-ventilated environment to prevent carbon monoxide buildup. Adequate ventilation enhances system performance, improves indoor air quality, and ensures safety. Always follow manufacturer guidelines for ventilation requirements specific to your heating system.
Remote Control and Monitoring
Honeywell central heating controllers provide remote control via the Honeywell Home App, allowing users to monitor and adjust settings from their smartphones. Voice control with smart speakers is also supported, enhancing convenience and energy management.
Using Honeywell Home App for Remote Control
The Honeywell Home App allows users to remotely monitor and control their central heating systems. Through the app, you can adjust temperatures, view schedules, and receive notifications. Geofencing technology automatically adjusts settings based on your location. The app also enables voice control integration with smart speakers, enhancing convenience. Compatible with Honeywell’s smart thermostats, it ensures energy efficiency and comfort from anywhere. This feature is ideal for modern households seeking advanced control over their heating systems.
Setting Up Voice Control with Smart Speakers
Enhance your Honeywell central heating controller experience with voice control through smart speakers like Amazon Alexa or Google Nest. Start by linking your Honeywell Home App account with your smart speaker. Once connected, use voice commands to adjust temperatures, switch modes, or check system status. For example, say, “Hey Google, set the living room to 20°C,” or “Alexa, turn on the heating.” This seamless integration offers hands-free convenience, making it easier to manage your home’s comfort without lifting a finger.
Monitoring Energy Usage Remotely
Monitor your energy usage remotely using the Honeywell Home App, compatible with Honeywell central heating controllers. Track energy consumption in real-time, receive alerts for unusual usage, and view detailed reports to identify savings opportunities. Adjust settings remotely to optimize efficiency without compromising comfort. This feature helps you stay informed and in control of your energy use, ensuring your home remains comfortable while reducing waste and lowering bills.

Wiring and Compatibility
Honeywell controllers are designed for seamless integration with various heating systems, including gas and oil setups. Their wiring diagrams ensure straightforward installation, and compatibility with existing infrastructure makes them versatile solutions for modern homes.
Understanding Wiring Diagrams for Honeywell Controllers
Wiring diagrams for Honeywell controllers are essential for proper installation. They detail connections for power, heating systems, and zones. These diagrams vary by model but typically include components like zone panels, thermostats, and transformers. Compatibility with gas, oil, or electric systems is clearly outlined. Proper wiring ensures safe and efficient operation. Always consult the specific model’s user guide for detailed instructions, as incorrect wiring can lead to system malfunctions or safety hazards. Accurate installation is critical for optimal performance and energy efficiency.
Compatibility with Existing Heating Systems
Honeywell controllers are designed to integrate seamlessly with various heating systems, including gas, oil, and electric setups. Their versatile design ensures compatibility with most existing infrastructure, making upgrades straightforward. Whether your system uses a traditional boiler or a modern heat pump, Honeywell controllers adapt to meet the specific requirements. This universal compatibility allows homeowners to enhance their heating system’s efficiency without major overhauls, ensuring continued reliability and performance. Proper installation ensures smooth operation across different system types, maintaining comfort and energy efficiency.
Installer Setup Mode for Advanced Configuration
The Installer Setup Mode on Honeywell controllers allows professionals to configure advanced settings tailored to specific heating systems. This mode provides access to detailed parameters for optimizing performance, such as boiler settings, system operation, and compatibility adjustments. By enabling this mode, installers can fine-tune the controller to ensure seamless integration with existing infrastructure. It is designed for trained technicians to unlock the full potential of the system, ensuring efficient and reliable operation. This feature is essential for complex installations requiring customized configurations.

User Guides and Manufacturer Support
Honeywell provides comprehensive user guides and dedicated support for their central heating controllers. Manuals and troubleshooting tips are available online, ensuring easy access for optimal system operation.
Locating the User Guide for Specific Models
To find the user guide for your Honeywell central heating controller, visit the official Honeywell website. Select your specific model from the product list, and download the corresponding manual. Ensure compatibility by verifying the model number. Additional resources, such as troubleshooting guides and FAQs, are also available to assist with setup, operation, and maintenance. This streamlined process ensures you have all necessary information to optimize your controller’s performance and enjoy efficient heating system management.
Contacting Honeywell Customer Support
For assistance with your Honeywell central heating controller, contact their customer support team. Visit the official Honeywell website and navigate to the support section. Choose your product model to access contact details, including phone numbers, email, and live chat options. Additionally, the website offers a comprehensive FAQ section and troubleshooting guides. Ensure you have your model number ready for quicker service. Honeywell’s dedicated support ensures efficient resolution of any queries or issues, providing peace of mind for optimal system operation.
Online Resources for Troubleshooting and Manuals
Visit Honeywell’s official website for comprehensive online resources, including detailed manuals and troubleshooting guides. The Honeywell Home app offers additional support, enabling remote control and monitoring of your heating system. For specific models, such as the ST9100A or CM727, user guides are readily available for download. Troubleshooting sections address common issues, while FAQs provide quick solutions. Use the website’s model-specific search tool to locate your controller’s manual and ensure optimal performance with accurate instructions and support.
Honeywell central heating controllers are essential for efficient temperature management, offering programmable schedules and smart home integration for optimal comfort and energy savings. Regular updates ensure enhanced performance and compatibility, guiding users toward smarter heating solutions.
Final Tips for Optimal Use
- Regularly update your controller software for enhanced features and performance.
- Adjust temperature setpoints seasonally to maximize energy savings.
- Use the Honeywell Home app for remote monitoring and adjustments.
- Ensure proper installation and placement for accurate temperature sensing.
- Review and adapt your heating schedule based on lifestyle changes.
Future Updates and Upgrades
Honeywell continuously innovates, offering firmware updates to enhance controller functionality. These updates often include improved energy-saving features, expanded smart home integration, and user-friendly interface upgrades. Regularly checking for updates ensures your system remains efficient and secure. Additionally, compatibility with emerging technologies, such as advanced voice control and AI-driven energy optimization, is expected to expand, providing users with cutting-edge solutions for central heating management.