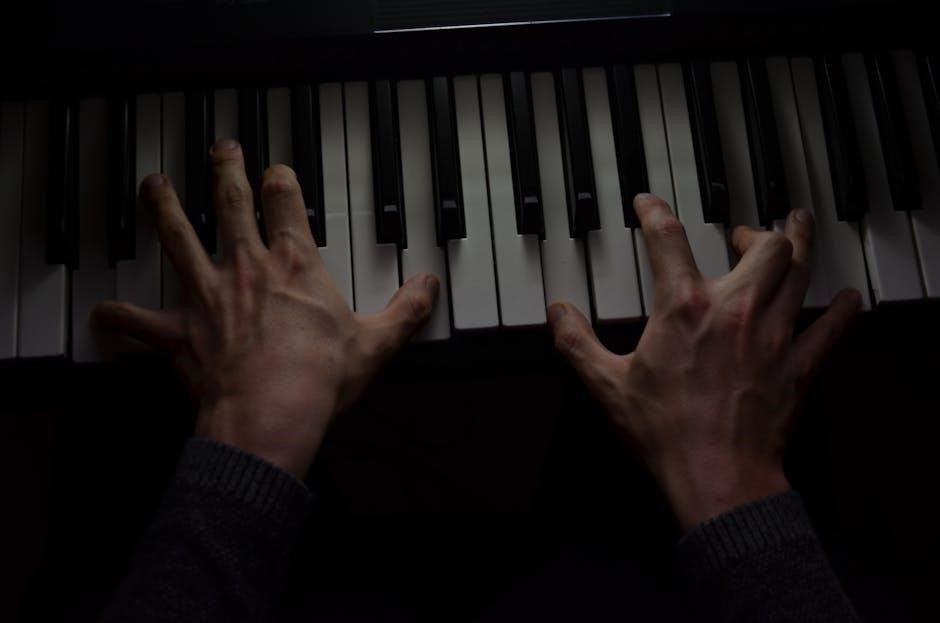
Understanding piano chords and their finger positions is fundamental for any pianist, offering a gateway to musical expression and harmonic exploration.
Effective chord playing relies heavily on ergonomic hand positioning, minimizing tension, and utilizing finger stretch and reach, mirroring techniques from other instruments.
Resources like comprehensive keyboard chord posters and printable charts, displaying fingering positions for all chords and inversions, are invaluable tools.
Beginners benefit from diagrams illustrating basic chords, while advanced players explore inversions and complex voicings for richer harmonic textures.
Mastering fingerings facilitates smooth chord transitions, employing strategies like “closest position” to optimize efficiency and musicality in your playing.
Consistent practice builds muscle memory, strengthening fingers and improving dexterity, ultimately unlocking a world of harmonic possibilities on the piano.
The Importance of Correct Fingerings
Employing correct fingerings for piano chords isn’t merely about hitting the right notes; it’s about establishing a foundation for efficient, expressive, and injury-preventative playing. Poor fingerings can lead to unnecessary tension, hindering smooth transitions and limiting your technical capabilities.
Ergonomics play a crucial role, mirroring principles found in other instrumental techniques like cello playing, where finger reach and stretch are carefully considered. Choosing fingerings that minimize hand movement and maximize comfort allows for greater control and musicality.
Utilizing resources like piano chord finger position PDFs and charts, which visually demonstrate optimal finger placements, is essential. These resources often highlight “closest position” techniques, facilitating seamless chord changes. Consistent practice with correct fingerings builds muscle memory, enabling faster, more accurate, and less fatiguing performances. Ultimately, prioritizing proper technique unlocks your full potential at the piano.
Understanding Chord Diagrams and PDFs
Piano chord diagrams and PDFs are invaluable tools for visualizing finger positions, especially for beginners navigating the complexities of harmony. These resources typically represent the keyboard as a series of black and white keys, with dots or numbers indicating where to place your fingers.

Comprehensive charts, like the “Complete Keyboard Chord Poster,” showcase all chords and inversions, allowing players to zoom in and out for detailed examination. PDFs often include multiple chords per page, categorized by key or chord type, facilitating quick reference.
Understanding the notation is key: numbers often correspond to fingers (1=thumb, 5=pinky), while different symbols may indicate inversions or added notes. Online interactive diagrams offer a dynamic learning experience, allowing you to hear the chord as you select the fingerings. Effectively utilizing these resources accelerates learning and builds a strong foundation in chord voicings.

Basic Major and Minor Chords ⎼ Finger Positions
Mastering fundamental major and minor chords is crucial, with readily available PDFs illustrating standard fingerings for C, G, D major, and A, E minor chords.
These charts provide a solid base for building harmonic vocabulary and understanding piano chord finger positions.
C Major Chord ⎻ Standard Finger Position
The C Major chord, a cornerstone of piano learning, is typically formed using the notes C-E-G. The standard fingering utilizes the right hand with fingers 1 (thumb) on C, 3 (middle finger) on E, and 5 (pinky) on G.
Many piano chord finger position PDFs clearly illustrate this arrangement, often with diagrams showing the keyboard and corresponding finger numbers. This fingering prioritizes comfort and ease of transition to other chords.
Beginner charts emphasize this position as a starting point, while more comprehensive resources may present alternative fingerings for specific musical contexts. However, the 1-3-5 configuration remains the most commonly taught and widely used for C Major.
Understanding this foundational chord and its standard fingering is essential for building a strong harmonic foundation and progressing to more complex chord voicings and progressions. Consistent practice reinforces muscle memory and fluency.
G Major Chord ⎻ Common Fingerings
The G Major chord, comprised of G-B-D, presents a few common fingering options for pianists. A frequently recommended fingering employs the right hand with fingers 2 (index) on G, 4 (ring finger) on B, and 5 (pinky) on D.
Piano chord finger position PDFs often showcase this arrangement, alongside alternatives. Another option utilizes fingers 1 (thumb) on G, 3 (middle) on B, and 5 (pinky) on D, though it can be slightly more challenging initially.
The choice depends on context and desired transitions. Charts frequently highlight the 2-4-5 fingering for its smooth connection to C Major, facilitating efficient chord changes.
Complete keyboard chord posters demonstrate these variations, catering to different skill levels. Mastering both fingerings expands versatility and allows for seamless navigation through various musical pieces.
D Major Chord ⎻ Finger Placement Options
The D Major chord (D-F#-A) offers several finger placement options, detailed in many piano chord finger position PDFs. A standard fingering utilizes the right hand with fingers 2 (index) on D, 4 (ring) on F#, and 5 (pinky) on A.
Alternatively, some players prefer 1 (thumb) on D, 3 (middle) on F#, and 5 (pinky) on A, which can be beneficial for specific chord progressions. Charts often illustrate both, emphasizing the importance of ergonomic hand positioning.
Consider the subsequent chords when selecting a fingering; aiming for minimal hand movement is key. Complete keyboard chord posters showcase these variations, alongside inversions.
Beginners may find the 2-4-5 fingering easier to grasp initially, while more advanced players can experiment with alternatives for nuanced voicing and smoother transitions.
A Minor Chord ⎼ Recommended Fingerings
The A Minor chord (A-C-E) is a foundational chord, and piano chord finger position PDFs commonly recommend several fingerings for efficient playing. A frequently used right-hand fingering employs the index finger (2) on A, the middle finger (3) on C, and the ring finger (4) on E.
This configuration promotes a relaxed hand position and facilitates smooth transitions to neighboring chords; Some players opt for 1 (thumb) on A, 3 (middle) on C, and 5 (pinky) on E, particularly when prioritizing specific melodic lines.
Chord charts often display these options, highlighting the benefits of each based on context. Utilizing “closest position” – minimizing finger movement – is a key ergonomic principle.
Beginners should focus on mastering the 2-3-4 fingering, while more experienced pianists can explore alternatives for nuanced voicing and efficient chord changes.
E Minor Chord ⎼ Finger Position Guide
The E Minor chord (E-G-B) presents unique fingering considerations, often detailed in piano chord finger position PDFs. A standard right-hand approach utilizes the index finger (2) on E, the middle finger (3) on G, and the ring finger (4) on B. This allows for comfortable reach and smooth transitions.
Alternatively, some pianists prefer the thumb (1) on E, middle finger (3) on G, and pinky (5) on B, especially when navigating complex passages or prioritizing melodic clarity. Charts frequently illustrate both options.
Ergonomics play a crucial role; minimizing tension is paramount. The “closest position” principle – reducing finger movement – is highly recommended for efficient playing.
Beginners should prioritize the 2-3-4 fingering for foundational technique, while advanced players can experiment with variations for expressive voicing and seamless chord progressions.

Chord Inversions and Fingerings
Chord inversions alter the bass note, impacting fingering choices detailed in piano chord PDFs. Mastering these positions expands harmonic possibilities and voicing options.
Understanding inversions requires adapting finger placements for smooth transitions and ergonomic hand positioning, enhancing musical expression and technical proficiency.
What are Chord Inversions?
Chord inversions represent alternative voicings of the same chord, achieved by rearranging the order of the notes while maintaining the same harmonic quality. Instead of the root note being the lowest, the third or fifth can become the bass note, creating first and second inversions respectively.
Piano chord PDFs often illustrate these inversions alongside standard voicings, showcasing different finger positions for each. This is crucial because inversions significantly impact the smoothness of chord progressions and the overall musical texture.
Understanding inversions allows pianists to connect chords more seamlessly, minimizing hand movement and creating a more fluid sound. The “closest position” technique, highlighted in online resources, leverages inversions to reduce finger displacement during transitions.
Visual aids like comprehensive keyboard chord posters demonstrate these fingerings clearly, benefiting both beginners and advanced players. Exploring inversions unlocks a deeper understanding of harmony and expands expressive capabilities at the piano.
C Major Chord ⎼ First Inversion Finger Position
The C Major chord in first inversion places the E (the third) as the lowest note, altering the chord’s voicing and creating a different harmonic color. A common finger position utilizes the right hand with fingers 1 (thumb) on E, 2 (index) on G, and 5 (pinky) on C.
Piano chord PDFs will visually depict this arrangement, often alongside diagrams for the root position and second inversion. This allows for quick reference and comparison of fingerings.
Practicing this inversion is vital for smooth transitions, particularly when moving to chords sharing common tones. Utilizing “closest position” principles, as demonstrated in online charts, minimizes hand movement.
Ergonomic considerations are key; ensure relaxed hand posture and avoid unnecessary tension. Resources like complete keyboard chord posters emphasize proper technique for all inversions, promoting efficient and musical playing.
C Major Chord ⎼ Second Inversion Finger Position
In the second inversion of the C Major chord, G (the fifth) becomes the lowest note, offering a distinct harmonic quality. A frequently recommended fingering for the right hand involves fingers 1 (thumb) on G, 3 (middle) on C, and 5 (pinky) on E.
Piano chord finger position PDFs often illustrate this alongside the root position and first inversion, providing a comprehensive visual guide. These charts are invaluable for beginners learning inversions.
Mastering this position facilitates smoother chord progressions, especially when transitioning to chords with similar bass notes. Charts demonstrating “closest position” fingerings aid in efficient movement.
Remember to prioritize ergonomic hand positioning, minimizing tension and maximizing reach. Complete keyboard chord posters highlight proper technique, ensuring comfortable and musical execution of all C Major inversions.
G Major Chord ⎻ Inversion Fingerings
G Major chord inversions offer varied harmonic textures and smoother transitions. First inversion (B in the bass) commonly uses fingers 1 (thumb) on B, 3 (middle) on D, and 5 (pinky) on G. Second inversion (D in the bass) often employs 1 (thumb) on D, 3 (middle) on G, and 5 (pinky) on B.
Comprehensive keyboard chord posters and printable PDFs visually represent these fingerings, aiding learning. These resources often include diagrams showing “closest position” voicings for efficient chord changes.
Understanding inversions is crucial for creating compelling harmonic progressions. Charts detailing finger replacement strategies help navigate transitions between inversions and other chords.
Prioritize ergonomic hand positioning to minimize tension. Consistent practice with these fingerings builds muscle memory, enabling fluid and musical execution of G Major in all its inversions.

Advanced Chord Fingerings & Techniques
Exploring seventh chords, diminished, and augmented harmonies requires nuanced fingerings, often found in detailed piano chord PDFs. Mastering “closest position”
optimizes hand ergonomics and facilitates seamless transitions between complex chord voicings for expressive playing.
Seventh Chords ⎻ Finger Position Considerations
Navigating seventh chords introduces complexities beyond basic triads, demanding careful consideration of finger placement as detailed in piano chord PDFs. Unlike major or minor chords, seventh chords often require wider stretches or adjustments to avoid awkward hand positions and maintain fluidity.
When approaching dominant seventh chords (like G7), prioritize fingerings that allow for smooth voice leading to the tonic chord. Often, utilizing the fifth finger on the seventh interval is beneficial, but assess based on the subsequent chord. Minor seventh chords (like Am7) frequently employ similar fingerings to their minor triad counterparts, with slight modifications for the added seventh.
PDF resources showcasing various seventh chord voicings are invaluable, illustrating different fingerings and their impact on playability. Experiment with inversions to discover comfortable and efficient fingerings, always prioritizing minimal tension and maximizing musical expression. Remember that the “closest position” principle applies, aiming for the smallest possible hand movements between chords.
Diminished and Augmented Chords ⎼ Fingerings
Diminished and augmented chords present unique fingering challenges due to their symmetrical structures, often requiring adaptations found in comprehensive piano chord PDFs. Diminished chords, with their compressed intervals, frequently benefit from fingerings that minimize stretching and maximize hand comfort.
Consider utilizing fingerings that allow for easy pivoting between inversions, leveraging the chord’s inherent symmetry. Augmented chords, while less common, demand similar attention to hand positioning, prioritizing smooth transitions and avoiding unnecessary tension. PDF charts often illustrate multiple fingering options, catering to different hand sizes and preferences.
Experiment with different voicings and inversions to discover what feels most natural and efficient for your playing style. The principle of “closest position” remains crucial, minimizing hand movement between chords. Remember to analyze the context of the chord progression to select fingerings that facilitate seamless transitions and musical phrasing.
Playing in “Closest Position”
“Closest Position”, a technique often highlighted in piano chord finger position PDFs, prioritizes minimizing hand movement during chord changes. This involves selecting fingerings where common tones between chords are held by the same fingers, reducing the number of notes that need to be replaced.
The concept, favored by piano teachers, streamlines transitions, creating a smoother and more connected musical line. PDF charts frequently demonstrate this approach, visually illustrating which notes to retain and which to adjust when moving between chords within a key. It’s particularly effective when navigating major scale chord progressions.
Mastering closest position requires careful analysis of chord relationships and a willingness to experiment with different fingerings. While not always the most intuitive choice initially, consistent practice builds muscle memory and unlocks greater efficiency and fluidity in your playing. Ultimately, it enhances musical expression by reducing unnecessary physical effort.

Ergonomics and Hand Anatomy for Chord Playing
Understanding hand anatomy is crucial; index and pinky fingers stretch easily, unlike middle and ring fingers. PDF resources emphasize tension-free chord voicings for comfortable, efficient playing.
Prioritizing ergonomics prevents strain and promotes long-term musical health, enhancing your piano chord technique and overall performance.
Minimizing Tension in Chord Voicings
Achieving relaxed chord voicings is paramount for fluid piano playing and preventing injuries. PDF chord charts often illustrate fingerings designed to minimize unnecessary hand movement and strain. Focus on utilizing the natural curvature of your hand, avoiding excessive stretching or contorting of fingers.
Consider the “closest position” technique, where chords are voiced with minimal intervals between notes, reducing the distance fingers need to travel. This is particularly helpful during chord transitions. Analyze chord diagrams carefully, noting which fingerings promote a natural hand position.
Experiment with different fingerings, even for the same chord, to discover what feels most comfortable and efficient for your hand. Pay attention to any tension in your wrist, forearm, or shoulders, and adjust your technique accordingly. Remember, the goal is to play with ease and expressiveness, not force.
Utilizing Finger Stretch and Reach
Effective piano playing often requires strategic finger stretching and reaching, particularly when navigating wider chord voicings. PDF chord resources can visually demonstrate fingerings that maximize reach while maintaining hand relaxation. Understand that the index (finger 2) and pinky (finger 5) generally have greater stretching capabilities than the middle (finger 3) and ring (finger 4) fingers.
When encountering chords demanding a stretch, avoid forcing the movement. Instead, subtly adjust your wrist and arm position to facilitate a more natural reach. Utilize the thumb for support and leverage, allowing other fingers to extend comfortably.
Chord charts displaying inversions can offer alternative fingerings that minimize stretching. Practice exercises specifically designed to improve finger independence and flexibility. Remember, controlled stretching is key; prioritize technique over brute force to prevent strain and injury.
Resources for Piano Chord Finger Position PDFs
Numerous online resources offer free printable chord charts and comprehensive keyboard posters, displaying finger positions for chords and inversions, aiding learning.
Interactive diagrams and complete keyboard chord charts, zoomable like maps, provide accessible learning tools for players of all skill levels.

Free Printable Chord Charts
Accessing free printable chord charts is an excellent starting point for piano learners seeking visual aids for finger positions. These charts typically display common major and minor chords, often categorized by key, with clear diagrams illustrating the correct finger placement for each note within the chord.
Many websites offer downloadable PDFs, allowing you to print and keep these resources readily available during practice sessions. These charts often include basic chord voicings, providing a foundation for building more complex harmonies. Look for charts that clearly label the fingers (1=thumb, 2=index, etc.) to avoid confusion.
Beginners will find these charts particularly helpful in memorizing fundamental chord shapes, while more experienced players can use them as quick references for less frequently used chords. Remember to supplement these charts with audio examples to reinforce the sound of each chord and its corresponding fingering.
Searching online for “piano chord charts PDF” will yield a wealth of options, ranging from simple diagrams to more detailed resources including chord inversions and variations.
Comprehensive Keyboard Chord Posters
Comprehensive keyboard chord posters represent a significant investment for serious piano students, offering a visually complete overview of chord voicings and fingerings. Unlike simple charts, these posters often display a vast array of chords – major, minor, seventh, diminished, augmented, and inversions – all within a single, easily referenced format.
The “Complete Keyboard Chord Poster” exemplifies this, functioning much like a musical map, allowing players to “zoom in” on specific chords and their finger positions. These posters are designed for all skill levels, with beginner sections focusing on basic chords and advanced sections exploring more complex harmonies.
A key benefit is the immediate visual access to chord shapes, aiding in memorization and reducing reliance on constant reference to separate PDFs. They often include chord diagrams, clearly indicating finger numbers and note placements, fostering efficient learning and practice.
Investing in a high-quality poster provides a constant, readily available resource for harmonic exploration and improvisation.
Online Interactive Chord Diagrams
Online interactive chord diagrams offer a dynamic alternative to static PDF charts and posters, providing a modern and engaging learning experience for piano players. These digital tools allow users to explore chord fingerings in a visually interactive manner, often featuring audio playback to reinforce correct voicings.
Unlike traditional resources, interactive diagrams frequently allow customization – users can select different chord types, inversions, and even keys, instantly updating the displayed fingering. This adaptability is particularly beneficial for understanding harmonic relationships and transposing chords.
Many platforms offer features like adjustable tempo for practicing chord changes and the ability to isolate individual notes within a chord, aiding in focused learning. Some even integrate with virtual keyboards, allowing users to play the chords directly on their computer.
These digital resources complement PDF chord charts, offering a flexible and personalized approach to mastering piano chord finger positions.

Transitioning Between Chords
Smooth chord changes depend on efficient finger replacement strategies, often visualized in chord charts, enabling quick transitions and minimizing hand movement.
Utilizing “closest position” techniques, as shown in some charts, streamlines movement, fostering fluidity and musicality in chord progressions.
Smooth Chord Changes ⎼ Finger Replacement Strategies
Effective chord transitions hinge on minimizing unnecessary hand movement and employing strategic finger replacements, often detailed in piano chord finger position PDFs. These charts visually demonstrate how to shift fingers between chords with maximum efficiency.
A key technique involves identifying common tones between chords, anchoring those fingers while smoothly replacing others. Charts illustrating movement from a 1st chord to others within a major scale highlight these replacement notes.
The concept of “closest position,” frequently referenced by piano instructors, emphasizes minimizing the distance fingers travel. PDFs often showcase fingerings that prioritize this proximity, leading to more fluid and less strenuous playing.
Practicing these transitions slowly and deliberately, referencing the PDF for visual guidance, builds muscle memory and enhances coordination. Focus on maintaining a relaxed hand position throughout the change, avoiding tension that hinders smoothness.
Ultimately, mastering finger replacement strategies, guided by chord charts, unlocks a more seamless and expressive piano playing experience.
Using Chord Charts for Efficient Transitions
Piano chord finger position PDFs serve as invaluable roadmaps for efficient chord transitions, visually outlining optimal fingerings for seamless harmonic movement. These charts, often resembling a “Google Map” for chords, allow for easy zooming and detailed examination.
Comprehensive charts display not only basic chord shapes but also inversions, providing a wider range of transition options. Utilizing these inversions can minimize hand movement and create smoother voice leading between chords.
Beginner charts focus on fundamental chords in major and minor keys, while advanced charts incorporate seventh chords and more complex harmonies. Regularly consulting these resources during practice reinforces correct finger placement.
Effective use involves identifying the target chord and its recommended fingering, then planning the finger replacements needed from the current chord. This pre-planning reduces hesitation and promotes fluidity.
By consistently referencing chord charts, pianists develop a deeper understanding of harmonic relationships and optimize their technique for efficient and expressive playing.

Practicing Chord Fingerings
Consistent practice, utilizing piano chord PDFs, builds muscle memory and dexterity, strengthening fingers for fluid transitions and efficient chord voicings.
Exercises focusing on finger strength and repetition are crucial for mastering finger positions and achieving effortless chord changes.
Exercises for Building Finger Strength and Dexterity
Begin with simple chord progressions, utilizing piano chord PDFs as visual guides, focusing on smooth transitions between C Major, G Major, and A Minor.
Practice scales and arpeggios in all keys, emphasizing correct fingerings and evenness of tone, gradually increasing tempo for enhanced dexterity.
Implement Hanon exercises or similar technical drills, adapting them to incorporate chord shapes and inversions, building finger independence and strength.
Focus on finger replacement strategies, as illustrated in chord charts, efficiently swapping fingers within chords to minimize movement and maximize fluidity.
Utilize a metronome to maintain consistent rhythm and gradually increase speed, challenging your fingers to adapt and improve their coordination.
Incorporate exercises that isolate individual fingers, strengthening weaker digits and promoting balanced hand development, referencing chord diagrams for proper positioning.
Regular practice, even in short bursts, is more effective than infrequent long sessions, fostering consistent progress and solidifying muscle memory.
Consistent Practice for Muscle Memory
Regular, focused practice is paramount for embedding piano chord finger positions into muscle memory, transforming conscious effort into automatic execution.
Utilize piano chord PDFs and charts daily, even for short periods, reinforcing correct fingerings and minimizing reliance on visual cues over time.
Repetition of chord progressions, starting slowly and gradually increasing tempo, builds neural pathways, solidifying the connection between mind and muscle.
Incorporate “shadowing” – playing along with recordings while referencing chord diagrams – to internalize timing and phrasing alongside finger placement.
Focus on playing without looking at your hands, relying on tactile feedback and muscle memory to guide your fingers to the correct positions.
Break down complex chord changes into smaller segments, mastering each transition before combining them into a seamless sequence.
Consistency trumps intensity; short, daily practice sessions are more effective than infrequent, lengthy ones for long-term retention and skill development.