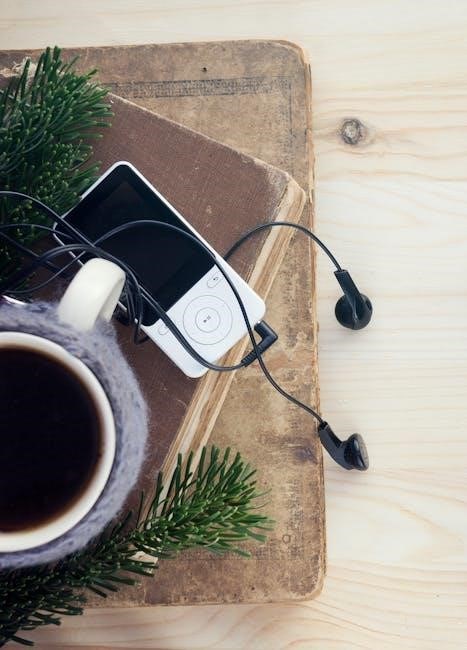
SanDisk’s Sansa Clip is a portable MP3 player‚ boasting a sleek‚ wearable design with a convenient clip. Enjoy music‚ FM radio‚ and voice recording features!
What’s in the Box

Upon opening your SanDisk Sansa Clip package‚ you should find several key components ensuring a smooth start to your listening experience. The box contains the Sansa Clip MP3 player itself‚ readily equipped with its signature removable clip for easy attachment. You’ll also receive a USB cable‚ essential for transferring music files and charging the device.
Furthermore‚ a quick start guide is included‚ providing basic instructions to get you up and running quickly. While a full user manual is often available online for download‚ the quick start guide offers immediate assistance. Please verify all components are present and undamaged upon unboxing. Retain the original packaging for potential warranty claims or returns.
Sansa Clip Overview ౼ Features
The SanDisk Sansa Clip is packed with features in a compact design. Its primary function is‚ of course‚ music playback‚ supporting popular audio formats. Beyond music‚ it includes an integrated FM radio‚ allowing you to tune into your favorite stations on the go. A built-in microphone enables convenient voice recording‚ perfect for notes or memos.
The player boasts a 1.0-inch display screen for navigating menus and viewing track information. Its wearable clip ensures secure attachment during activities. It supports expandable storage via microSD card (sold separately)‚ increasing your music library capacity. The Sansa Clip offers a user-friendly interface and long battery life for extended enjoyment.
System Requirements
To transfer music and manage files on your SanDisk Sansa Clip‚ a compatible computer is required. The player supports connection to both Windows and Mac operating systems. For Windows users‚ a system running Windows Vista‚ 7‚ 8‚ or 10 is recommended‚ with a minimum of 128MB of RAM.
Mac users will need macOS X 10.6 or later‚ also with at least 128MB of RAM. A free USB port is essential for connecting the Sansa Clip to your computer. Basic computer literacy for file management is helpful. No special software installation is typically needed‚ as the player functions as a mass storage device.
Getting Started
Begin enjoying your SanDisk Sansa Clip by charging the device and familiarizing yourself with its simple controls and intuitive user interface.
Charging the Player
Before first use‚ it’s recommended to fully charge your SanDisk Sansa Clip. Connect the player to a computer using the included USB cable. The battery indicator on the screen will illuminate‚ showing the charging status. A full charge typically takes approximately two to three hours‚ depending on the current battery level.
You can charge the Sansa Clip from a computer’s USB port or a USB wall adapter (not included). While charging‚ you can continue to use the player‚ but charging time may be extended. Once fully charged‚ the battery indicator will display a full battery icon. Disconnect the player from the USB source when charging is complete to preserve battery life.
Powering On and Off
To power on your SanDisk Sansa Clip‚ press and hold the Power/Play button located on the side of the device. The screen will illuminate‚ displaying the Sansa logo and then the main menu. The player will resume playback from where you last left off‚ if music was playing.
To power off the player‚ press and hold the Power/Play button again for a few seconds. A confirmation message will appear on the screen asking if you want to power off. Select “Yes” using the navigation buttons and press the Select button to confirm. The screen will go blank‚ indicating that the player is turned off.
Navigating the Interface
The SanDisk Sansa Clip utilizes a simple‚ intuitive interface. Use the Up and Down navigation buttons on the front of the player to scroll through menu options and lists. Press the Select button to confirm your choice or enter a submenu.
To return to the previous menu‚ press the Back button. The Power/Play button also functions as a Play/Pause button during music playback; Holding the Power/Play button will initiate the power off sequence. Familiarize yourself with these controls to efficiently navigate the player’s features and settings.

Music Playback
Enjoy your favorite tunes! The Sansa Clip supports various audio formats‚ allowing you to easily transfer and play music files on the go.
Transferring Music Files
Connecting your SanDisk Sansa Clip to your computer allows for seamless music transfer. Simply use the included USB cable to connect the player to an available USB port.
Your computer will recognize the Sansa Clip as a removable drive. You can then drag and drop music files (like MP3‚ WMA‚ and others – check the full format list in the manual) directly onto the player’s storage.
Organize your music into folders on your computer before transferring for easier navigation on the Sansa Clip. Ensure the files are compatible with the player to avoid playback issues. Disconnect safely after the transfer is complete to prevent data corruption.
Creating and Managing Playlists
The SanDisk Sansa Clip allows you to create personalized playlists for customized listening experiences. Navigate to the playlist creation option within the player’s menu system; You can then select songs directly from your library to add to a new playlist.
Name your playlists descriptively for easy identification. You can reorder songs within a playlist to suit your preferences. Editing existing playlists is also straightforward – simply add or remove songs as desired.
Deleting unwanted playlists is possible through the menu. Regularly updating your playlists keeps your music library fresh and organized on your Sansa Clip.
Playback Controls
The SanDisk Sansa Clip features intuitive playback controls for a seamless listening experience; Use the directional buttons to navigate through tracks – forward to skip‚ backward to replay. The central select button initiates or pauses playback.
Adjust the volume using the dedicated volume controls‚ ensuring comfortable listening levels. Explore options for shuffle and repeat modes to diversify your playback. The player supports various audio formats‚ providing flexibility in your music choices.
Long-pressing certain buttons may reveal additional functions‚ such as quick access to playlist options or equalizer settings. Familiarize yourself with these controls for optimal use.
FM Radio
The Sansa Clip includes a built-in FM radio‚ allowing you to tune into your favorite stations for broadcast entertainment on the go.
Tuning into Stations
To begin listening to the FM radio on your SanDisk Sansa Clip‚ navigate to the FM radio menu within the player’s interface. Use the directional buttons to scan for available stations. The player will automatically search for and display available frequencies.
Once a station is found‚ select it to begin playback. You can fine-tune the reception by using the tuning controls‚ ensuring a clear signal. If the signal is weak‚ try adjusting the orientation of the player or moving to a location with better reception. The Sansa Clip allows for manual tuning as well‚ providing greater control over station selection.
Saving Presets
The SanDisk Sansa Clip allows you to save your favorite FM radio stations as presets for quick and easy access. While listening to a desired station‚ navigate to the preset saving option within the radio menu. Typically‚ this involves pressing and holding a numbered button or selecting a “Save” option.
The player will prompt you to choose a preset number to assign to the current station. Once saved‚ you can quickly switch between your favorite stations by simply selecting the corresponding preset number. This feature eliminates the need to repeatedly scan for stations‚ providing a convenient listening experience. You can overwrite existing presets as needed.
Voice Recording
The Sansa Clip features a built-in microphone‚ enabling convenient voice recording. Capture notes‚ lectures‚ or ideas directly on your portable MP3 player!
Using the Built-in Microphone
The SanDisk Sansa Clip’s integrated microphone allows for straightforward voice recording. To begin‚ navigate to the voice recording function within the player’s menu. Ensure a quiet environment for optimal audio quality‚ minimizing background noise. The microphone is sensitive enough to capture clear recordings at a reasonable distance.
Before recording‚ you may have options to select a recording format (like WAV or MP3) and adjust the recording quality. Higher quality settings will result in larger file sizes. During recording‚ a visual indicator on the screen will confirm active capture. After recording‚ your voice memo is saved as a file‚ easily accessible for playback through the player’s music library.
Recording and Playback
Once a voice recording is complete on your SanDisk Sansa Clip‚ it’s automatically saved as an audio file‚ typically within a dedicated “Recordings” folder in the player’s file system. Access these recordings through the main menu‚ selecting the option for voice memos or recordings. Playback controls – play‚ pause‚ stop‚ fast forward‚ and rewind – function identically to music playback.
You can easily manage your recordings‚ deleting unwanted files to free up storage space. The player supports standard audio file formats for recordings‚ ensuring compatibility. Reviewing your recordings allows you to confirm audio clarity and adjust recording settings for future sessions‚ optimizing the quality of your voice memos.
Settings and Customization
Personalize your SanDisk Sansa Clip! Adjust volume levels‚ fine-tune the equalizer for optimal sound‚ and customize the display settings to your preference.
Adjusting Volume and Equalizer
Controlling the audio experience on your SanDisk Sansa Clip is straightforward. Volume adjustment can be made directly through the player’s interface using the dedicated volume controls – typically up and down buttons. Precise control allows for comfortable listening across various environments.
The built-in equalizer offers preset options to enhance your music. These presets‚ such as Rock‚ Pop‚ Classical‚ and Jazz‚ tailor the sound to specific genres. Experiment with each setting to discover what best suits your listening preferences. You can often find the equalizer settings within the player’s main menu‚ under ‘Sound’ or ‘Audio’ options. Fine-tuning the equalizer ensures optimal audio quality for all your favorite tracks.
Display Settings
The SanDisk Sansa Clip features a 1.0-inch display screen‚ and while basic‚ its settings can be adjusted for optimal viewing. Access the display settings through the main menu‚ typically found under ‘Settings’ or ‘Display’. Here‚ you can control the screen’s brightness to conserve battery life or improve visibility in bright sunlight.
Some models may offer a screen timeout option‚ automatically dimming or turning off the display after a period of inactivity. Adjusting this setting balances usability with power saving. While advanced customization options are limited‚ these settings ensure a clear and efficient user experience‚ maximizing the functionality of the compact display.

Troubleshooting
If your Sansa Clip malfunctions‚ try basic solutions like restarting or a factory reset. Consult the user manual for common issues and detailed guidance.
Common Issues and Solutions
Problem: The player won’t turn on. Solution: Ensure the player is adequately charged. Connect it to a computer via USB for at least 30 minutes. If it still doesn’t power on‚ attempt a reset by holding the power button for 10 seconds.
Problem: Music files aren’t recognized. Solution: Verify the file format is supported (MP3‚ WMA‚ etc.). Ensure files aren’t corrupted and are transferred correctly to the player’s folder.
Problem: FM radio isn’t working. Solution: Confirm headphones are plugged in‚ as they act as the antenna. Try retuning to stations or saving presets for easier access. Check for signal interference.
Problem: Player freezes or becomes unresponsive. Solution: Perform a factory reset (refer to the manual for instructions). This will erase all data‚ so back up important files beforehand.
Factory Reset
A factory reset restores your SanDisk Sansa Clip to its original settings‚ erasing all personal data‚ playlists‚ and custom configurations. This is useful for troubleshooting persistent issues or preparing the device for a new user.
To perform a factory reset: Power on the player. Navigate to the “Settings” menu using the directional buttons. Locate and select the “Factory Reset” or “Restore Defaults” option. Confirm your choice when prompted – be aware this action is irreversible!
The player will restart and return to its factory state. You will then need to re-transfer your music and reconfigure your settings. Back up important files before proceeding‚ as they will be lost during the reset process.